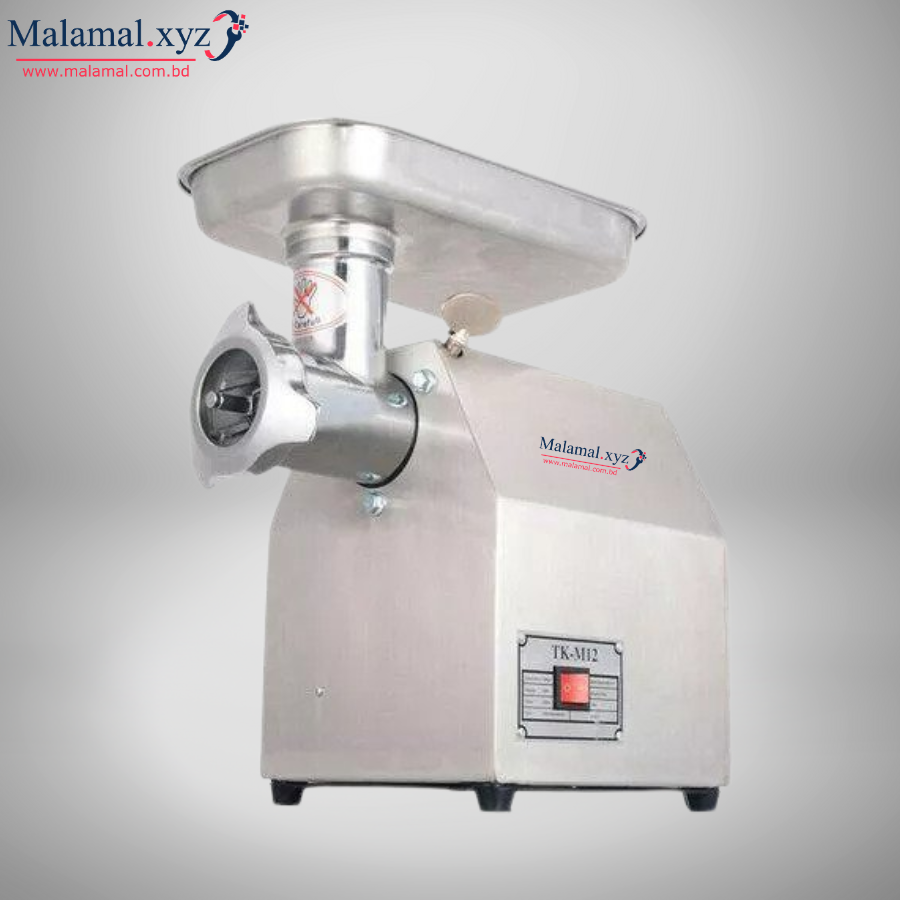
Ever unboxed a brand new meat grinder, laid out all the gleaming metal parts on your counter, and felt a slight sense of panic? It looks like a mechanical jigsaw puzzle. You’ve got the auger, the housing, the retaining ring… and then you have that little star-shaped blade and a disc full of holes. Getting them in the right order is everything. Learning How To Match The Blade To The Plate is arguably the single most important step to achieving that fluffy, perfectly textured ground meat of your dreams. Get it wrong, and you’re on a one-way trip to a mushy, unappetizing mess that clogs your machine. But don’t worry, you’ve come to the right place. Let’s break it down, get it right, and turn you into a grinding guru.
The Anatomy of the Grind: Blade and Plate Explained
Before we can match them, we need to understand what these two key players actually do. Think of them as a dynamic duo, a tag team working together to slice and dice. They can’t function without each other, and their relationship has to be just right.
The Grinder Blade (The “Star of the Show”)
This is the piece that does the actual cutting. It’s often called a “grinder knife” or a “cross blade,” and for a good reason. It typically has four arms, and if you look closely, you’ll notice two distinct sides:
- A flat, sharp side: These are the cutting edges. They are precision-honed to slice through meat and fat fibers cleanly.
- A raised, duller side: This side is usually slightly convex and is not meant for cutting.
Remembering that the blade’s primary job is to cut is the key to understanding its proper orientation.
The Grinding Plate (The “Gatekeeper”)
The grinding plate is a thick, metal disc perforated with holes. Its job isn’t to cut, but to determine the final texture of your grind. The meat, after being sliced by the blade, is forced through these holes.
- Coarse Plates (large holes, 8-10mm): Perfect for chili meat, rustic sausages, or the first grind in a two-step process.
- Medium Plates (medium holes, 6mm): Your all-purpose workhorse. Great for burger patties, meatloaf, and general grinding.
- Fine Plates (small holes, 3-4.5mm): Ideal for fine-textured sausages like frankfurters, pâtés, and some types of meatballs.
The plate acts as a stationary surface against which the moving blade can do its work.
The Golden Rule: How to Match the Blade to the Plate
Alright, here’s the secret sauce, the one piece of information that will save you countless headaches. It’s so simple you’ll wonder why it ever seemed complicated.
The Golden Rule: Flat to Flat.
That’s it. The flat, sharp side of the blade must always face outward, pressing flat against the grinding plate.
Let me say it again for the people in the back: The flat side of the blade presses against the flat side of the plate. Think of it like a pair of scissors. The two sharp edges have to slide right up against each other to make a clean cut. If they are separated, they just bend and mangle whatever is in between. It’s the exact same principle inside your grinder.
A Step-by-Step Assembly Guide
Let’s walk through the assembly process to see this in action.
- Insert the Auger: Start by placing the auger (the big corkscrew-looking piece) into the grinder’s main housing.
- Mount the Blade: Slide the blade onto the square pin at the end of the auger. This is the moment of truth. Make sure the flat, cutting edges are facing away from the auger and pointing outward, toward where the plate will go.
- Position the Plate: Take your desired grinding plate and place it over the blade. There’s usually a small notch on the edge of the plate that lines up with a pin on the grinder housing. This prevents the plate from spinning around. When you place it, you should feel the flat surface of the plate sitting perfectly flush against the flat surface of the blade.
- Secure the Ring: Finally, screw on the retaining ring. Tighten it firmly by hand, but don’t go crazy and use a wrench. It should be snug, but not so tight that you can’t undo it later.
And that’s it! You’ve correctly learned how to match the blade to the plate.
What Happens When You Get It Wrong? (The Grind-pocalypse)
I’ve been there. My first time, I was in a rush and put the blade on backward. The results were… humbling. If you install the blade with the dull, raised side facing the plate, you’re not cutting anymore. You’re smashing.
Here are the tell-tale signs of the dreaded Grind-pocalypse:
- Mushy, Pasty Meat: Instead of distinct strands of ground meat, you get a pinkish paste. The fat has smeared instead of being cut, which ruins the texture.
- Little to No Output: The grinder will hum and whir, but very little meat will actually come out of the plate.
- A Clogged Mess: The smashed meat and sinew will quickly clog the plate’s holes, backing everything up inside the housing.
- A Strained Motor: Your electric grinder’s motor might start to sound like it’s struggling or get overly hot. You’re making it work way too hard to push un-cut meat through small holes.
If you experience any of these symptoms, stop immediately. Unplug the machine, disassemble it, and re-orient the blade correctly.
Pro Tips for a Perfect Grind Every Time
Now that you know how to match the blade to the plate, let’s elevate your game with a few tips that separate the amateurs from the pros.
Keep It Sharp
A dull blade is almost as bad as an incorrectly installed one. Your blade and plate are a matched set. Over time, they wear together. If your grinds are getting mushy even with proper assembly, it might be time to sharpen or replace your blade and plate set.
Keep It Cold
This is the cardinal rule of meat grinding. Your meat, fat, and all the metal grinder components should be chilled in the freezer for at least 30-45 minutes before you start. Cold, firm fat cuts cleanly. Warm, soft fat smears. This one tip will improve your results more than anything else.
The “Two-Pass” Method
For incredibly tender burgers or fine sausages, try a double grind.
- Start with a coarse plate for the first pass.
- Chill the meat again for another 20-30 minutes.
- Switch to a fine plate and run the meat through a second time.
This creates an exceptionally uniform texture without overworking the meat.
Expert Take: As our resident appliance expert, Sarah Jenkins, often says, “Treat your grinder’s blade and plate like a chef treats their knives. They are precision tools. Keep them clean, keep them sharp, and always respect the ‘flat to flat’ rule. The machine will reward you with a perfect grind, every single time.”
Frequently Asked Questions (FAQ)
Q: Which side of the meat grinder blade is sharp?
A: The flat side of the blade is the sharp, cutting side. This flat side should always face outwards, sitting flush against the grinding plate to ensure a clean slicing action, which is essential when you properly match the blade to the plate.
Q: Can I use any blade with any plate?
A: Generally, blades and plates are designed in matched sets according to the grinder’s size (e.g., #5, #8, #12, #22, #32). While you can use different plates (coarse, fine) with the corresponding blade for that size, you should not mix blades and plates from different-sized grinders.
Q: How often should I replace my blade and plate?
A: This depends on usage. For a home user grinding a few times a month, a quality carbon or stainless steel set can last for years. If you notice a decline in performance, such as mushy grinds or slow output, it’s time to consider sharpening or replacing the set.
Q: Why is my meat grinder making a clicking noise?
A: A clicking noise could be a sign of a few things. First, check that the plate is seated correctly in the housing notch. If it’s spinning with the auger, it can click. It could also indicate a piece of bone or hard gristle hitting the blade.
Q: Does the size of the plate affect how to match the blade?
A: No, the principle remains the same regardless of whether you’re using a coarse, medium, or fine plate. The fundamental rule of “flat to flat” never changes. The flat, sharp side of the blade must always press directly against the grinding plate.
Your Grinding Journey Starts Now
Mastering your meat grinder is a journey, and understanding the simple, crucial relationship between its components is the first major step. That little detail of how to match the blade to the plate is the difference between frustration and pride, between a mediocre meal and an unforgettable one. You now hold the key to unlocking consistent, professional-quality results right in your own kitchen. So go forth and grind with confidence! Share your creations, experiment with textures, and enjoy the incredible flavor that only comes from freshly ground meat.