Ever wonder why that store-bought ground beef sometimes tastes a bit… bland? Or why your homemade burgers fall apart on the grill? The secret isn’t some fancy seasoning or a mystical cooking technique. It’s all about the grind. Learning How To Prepare Meat For Grinding is the single most important step in transforming good cuts of meat into spectacular, flavorful, and perfectly textured ground meat for any recipe. It’s the difference between a decent meal and an unforgettable one.
Forget the pre-packaged stuff. We’re about to pull back the curtain and show you the simple, game-changing techniques that butchers and pro chefs use. This isn’t just a recipe; it’s a foundation for better cooking. Ready to level up your kitchen game? Let’s dive in.
Why Bother Grinding Your Own Meat?
You might be thinking, “Is it really worth the effort?” Absolutely. The moment you taste the difference, you’ll be a convert for life. Grinding your own meat isn’t just a novelty; it’s about taking control of your food.
- Unbeatable Flavor and Texture: When you grind your own, you choose the cuts. This means you control the fat-to-meat ratio, which is the secret to juicy, flavorful results. You can create custom blends—a little brisket for flavor, some chuck for fat, a bit of sirloin for a beefy bite. The texture is also superior; it’s tender and toothsome, not mushy and compressed like mass-produced ground meat.
- Superior Quality and Safety: You see the meat that goes in, so you know exactly what you’re eating. There are no surprise fillers, no scraps from unknown sources. This transparency is especially crucial when it comes to food safety, significantly reducing the risk of cross-contamination that can occur in large processing plants.
- Cost-Effectiveness: Often, buying whole cuts of meat like chuck or pork shoulder and grinding them yourself is cheaper than buying pre-ground packages. You get a premium product for a better price. It’s a win-win.
The Main Event: How to Prepare Meat for Grinding Perfectly
This is where the magic happens. Proper preparation is 90% of the battle. Follow these steps, and you’ll be rewarded with a flawless grind every single time. This process is the cornerstone of how to prepare meat for grinding.
1. Choose Your Cut Wisely
The foundation of great ground meat is, well, great meat. But “great” doesn’t mean “expensive.” You’re looking for cuts with good flavor and, most importantly, the right amount of fat. The ideal target for burgers and meatballs is an 80/20 lean-to-fat ratio.
- For Beef: Chuck roast is the undisputed king. It has a fantastic beefy flavor and the perfect fat content. Brisket (specifically the point), short rib, and sirloin are also excellent choices to use on their own or in a blend.
- For Pork: Pork shoulder (or pork butt) is your go-to. It’s marbled with delicious fat and grinds beautifully for sausages, meatballs, or wonton fillings.
- For Poultry: Stick with dark meat like chicken thighs or turkey thighs. They have more fat and flavor than lean breast meat, which can become dry and chalky when ground.
2. The Big Chill: Cold is Gold
If you remember only one thing from this guide, let it be this: your meat, your grinder parts, and your bowl must be cold. Not cool, but ice-cold.
Why? When meat is ground, you want the fat and the muscle to be cut into distinct little pieces. If the fat is warm, it doesn’t cut—it smears. This smearing effect coats the grinder parts and results in a greasy, pasty, and mushy final product. It’s the cardinal sin of meat grinding.
Here’s the game plan:
- Cut the meat: Trim off any large, hard pieces of silver skin or gristle. Cut your chosen meat into rough 1-inch cubes. Uniformity isn’t critical, but they need to be small enough to easily fit into your grinder’s hopper.
- First Chill: Spread the meat cubes in a single layer on a baking sheet lined with parchment paper. Place the sheet in the freezer for 15-20 minutes. You want the cubes to be very firm on the outside, but not frozen solid.
- Chill the Gear: While the meat is chilling, place your grinder’s components—the auger, blade, grinding plate, and the head assembly—along with the bowl that will catch the meat, into the freezer as well.
Expert Tip: According to Chef David Wilson, a seasoned charcuterie expert, “People always remember to chill the meat, but they forget the equipment. A room-temperature grinder head will warm up your ice-cold meat instantly, defeating the whole purpose. Chilling the metal parts is non-negotiable for a professional-grade texture.”
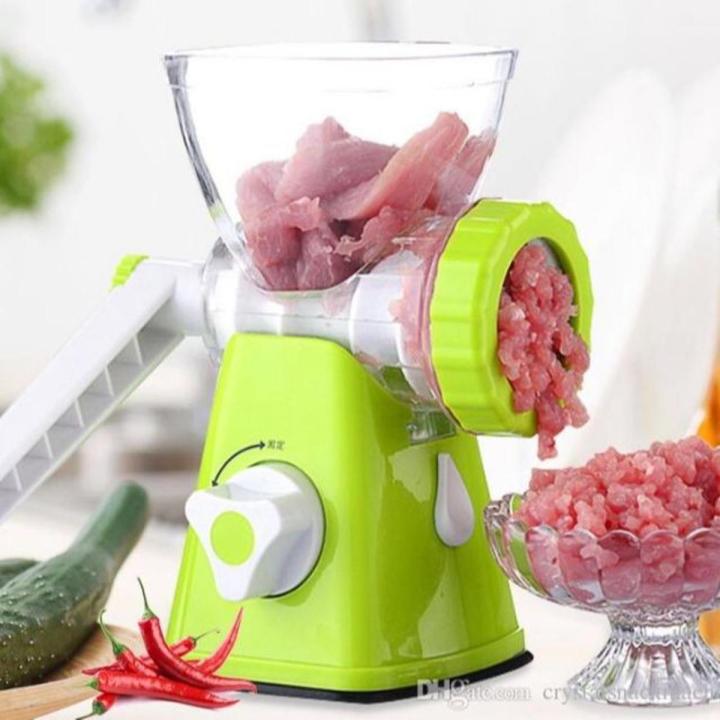
3. Assemble and Grind
Once everything is thoroughly chilled, it’s time to grind. Work quickly to keep everything cold.
- Assemble your grinder: Attach the now-frigid components to your grinder base. Start with a coarse grinding plate for your first pass. Place your chilled collection bowl under the spout.
- Feed the Beast: Turn the grinder on and begin feeding the firm meat cubes into the hopper. Don’t force them; use the food pusher to gently guide the meat down. Never use your fingers. You should see beautiful, distinct strands of ground meat emerging.
- The Second Grind (Optional): For a finer, more tender texture, perfect for sausages or certain types of meatballs, you can grind the meat a second time. Simply switch to a finer grinding plate, chill the meat again for about 10 minutes, and run it through once more. For a classic burger, a single coarse grind is often perfect.
How to Clean a Meat Grinder?
Cleaning your grinder properly is crucial for food safety and the longevity of your machine. The best way to clean a meat grinder is to do it immediately after use by first running a few pieces of bread through it to push out any remaining meat bits, then disassembling and hand-washing all parts in hot, soapy water.
Here’s a simple checklist to make it foolproof:
- [ ] Push out residue: Run 2-3 slices of stale bread through the assembled grinder. This is an old butcher’s trick that pushes out the last bits of meat and fat, making cleaning much easier.
- [ ] Disassemble completely: Take apart every component that came into contact with the meat.
- [ ] Wash thoroughly: Use a bottle brush and hot, soapy water to scrub every part. Pay close attention to the holes in the grinding plates.
- [ ] Rinse and Sanitize: Rinse all parts with clear hot water. For extra peace of mind, you can briefly soak them in a mild sanitizing solution (like a gallon of water with a tablespoon of bleach) and then rinse again.
- [ ] Dry Completely: This is critical, especially for carbon steel parts which will rust. Towel-dry every piece immediately and thoroughly. Let them air-dry for another hour to ensure no moisture remains.
- [ ] Store Properly: Lightly coat any carbon steel parts (like the blade and plates) with food-grade mineral oil to prevent rust. Store all parts in a dry place.
Beyond Burgers: Other Creative Uses for Your Grinder
Your meat grinder is far more versatile than its name suggests. Once you’ve mastered how to prepare meat for grinding, you can unlock a world of culinary possibilities. Think of it as a powerful texturizing tool for your kitchen.
- Homemade Sausages: This is the natural next step for any grinding enthusiast.
- Grinding Vegetables: Make relish, salsas, or grind firm vegetables like carrots and celery as a base for soups and sauces.
- Making Breadcrumbs: Run stale bread through for perfect, uniform breadcrumbs.
- Grinding Hard Cheeses: Effortlessly grind blocks of Parmesan or Romano.
- Making Falafel: Grind soaked chickpeas and aromatics for the perfect falafel texture.
Frequently Asked Questions (FAQ)
Q: Can I grind partially frozen meat?
A: Yes, in fact, you should! As detailed above, having the meat cubes partially frozen (firm to the touch but not solid) is the key to preventing fat smearing and achieving a perfect texture. Never try to grind fully-frozen, rock-solid meat, as this can damage your grinder’s motor and auger.
Q: What is the best meat-to-fat ratio for grinding?
A: For general-purpose ground meat, especially for burgers, the sweet spot is an 80/20 lean-to-fat ratio. This provides enough fat to keep things juicy and flavorful without being greasy. For lean sausages or healthier options, you might aim for 90/10, but you may need to add a binder to retain moisture.
Q: Why is my ground meat mushy and gray?
A: This is almost always caused by heat. If your meat, fat, or grinder components were not cold enough, the fat smeared instead of cutting, creating a pasty, emulsified texture. The smearing action also breaks down the meat’s structure, leading to that unappealing gray color.
Q: Can I grind bones in my meat grinder?
A: For most home-use meat grinders, the answer is a firm no. Grinding hard bones can break the auger, dull the blade, and burn out the motor. There are heavy-duty, commercial-grade grinders designed for this, but your standard kitchen model is not one of them. Small, soft chicken bones might be manageable for some powerful units, but always check your manufacturer’s instructions first.
Q: How many times should I grind my meat?
A: It depends on the desired texture. For a rustic, steak-like burger or chili, a single pass through a coarse plate is perfect. For a more tender, uniform texture for things like fine sausages, pâté, or emulsified fillings, a second pass through a finer plate is recommended.
Your Culinary Journey Starts Here
You now have the complete blueprint for success. The knowledge of how to prepare meat for grinding is what separates the amateurs from the pros. It’s about respecting the ingredients and understanding the process. By controlling the cuts, the fat content, and—most importantly—the temperature, you are taking complete command of the flavor and texture of your final dish.
So go ahead, pick up that beautiful chuck roast, chill your equipment, and experience the profound satisfaction of creating the best ground meat you’ve ever tasted. Your burgers, meatballs, and sausages will thank you for it.