There’s nothing quite like the taste of freshly ground meat for your burgers, sausages, or meatballs. It’s a game-changer. But after the culinary magic happens, you’re left with a machine that needs a thorough clean. The key to that, and to the longevity of your appliance, is knowing How To Disassemble A Meat Grinder correctly. It might seem daunting at first, a puzzle of metal parts, but trust me, it’s far simpler than you think. Getting this process down not only ensures impeccable hygiene but also keeps your grinder running smoothly for years to come.
Why Bother? The Importance of Proper Disassembly and Cleaning
Let’s be honest, after cooking a great meal, the last thing anyone wants is a complicated cleanup. It’s tempting to just rinse the outside and call it a day. But taking a few extra minutes to properly break down your machine is non-negotiable for a few critical reasons.
- Food Safety is Paramount: Tiny particles of raw meat can get trapped in the nooks and crannies of the grinder. If left there, they become a breeding ground for harmful bacteria like Salmonella and E. coli. Proper disassembly allows you to clean every single component, eliminating any food safety risks.
- Performance and Longevity: A clean machine is a happy machine. Residual meat and fat can harden, putting extra strain on the motor and dulling the blade and grinding plates. Regular disassembly and cleaning prevent buildup, ensuring your grinder operates at peak performance and extending its lifespan significantly.
- Prevents Flavor Contamination: Ever made pork sausage that had a faint, funky taste of the beef you ground last week? That’s flavor contamination. A deep clean after every use ensures that each batch of ground meat tastes exactly as it should.
Before You Begin: Gather Your Tools
You don’t need a full mechanic’s toolkit for this job. Having a few simple things ready will make the process a breeze.
- A clean, dry surface or a large tray to lay out the parts
- A sink with warm, soapy water
- A bottle brush or an old toothbrush for scrubbing
- A dry cloth or paper towels for drying
- A small bowl to keep track of smaller components
How to Disassemble a Meat Grinder: A Step-by-Step Guide
Whether you have a sleek electric model or a classic manual workhorse, the core components and disassembly process are remarkably similar. The main difference is that an electric grinder has a motor base you don’t submerge in water, while a manual one can often be fully washed after detaching it from the counter.
Ready? Let’s break it down.
- Safety First! Unplug the Grinder: This is the most important step for an electric model. Before you even think about touching the grinding head, ensure the machine is completely disconnected from the power source. For a manual grinder, simply make sure the handle is stationary.
- Run Bread Through the Grinder (Optional Pro-Tip): Before taking it apart, run a slice or two of stale bread through the machine. The bread acts like a sponge, pushing out the last bits of meat and fat stuck inside the auger and grinding plate. This makes the cleaning process so much easier.
- Remove the Food Pusher and Hopper Tray: These are the easiest parts. The food pusher, or “stomper,” simply lifts out of the feeder tube. The hopper tray, where you place the meat, usually just sits on top of the grinding head and can be lifted right off.
- Unscrew the Locking Ring: This is the large ring at the very front of the grinder that holds the grinding plate in place. It typically unscrews counter-clockwise. Sometimes it can be a bit tight due to pressure from the grinding process. If it’s stuck, you can get a better grip by wrapping it with a dry towel. Never use tools like pliers, as you can damage the threads.
- Carefully Remove the Grinding Plate and Blade: With the ring off, the grinding plate (the metal disc with holes) and the blade will be loose.
- The Grinding Plate: This will come out first. Be mindful of which side faces out for reassembly.
- The Blade: This is the star-shaped, four-pronged piece. Be very careful, as the edges are extremely sharp. Gently slide it off the end of the auger. I learned that lesson the hard way early on!
- Slide Out the Auger (The Corkscrew): The auger is the long, spiral-shaped part that pushes the meat forward. With the blade and plate removed, it should slide right out of the main housing (the T-shaped tube).
- Detach the Main Housing: On most electric grinders, the entire grinding head assembly (the T-shaped housing) attaches to the motor base with a locking knob or lever. Turn the knob or lever to release it, then gently twist and pull the housing away from the motor base.
You’ve done it! You now have a collection of parts, ready for a thorough cleaning. It’s much less intimidating when you see it’s only about 5-6 main pieces, right?
Expert Advice from Chef David Wilson: “The biggest mistake I see home cooks make is putting grinder parts in the dishwasher. Most are made of aluminum or coated metals that will oxidize and tarnish, ruining them instantly. Always wash by hand with warm, soapy water and dry them immediately and thoroughly to prevent rust.”
Reassembly: Putting It All Back Together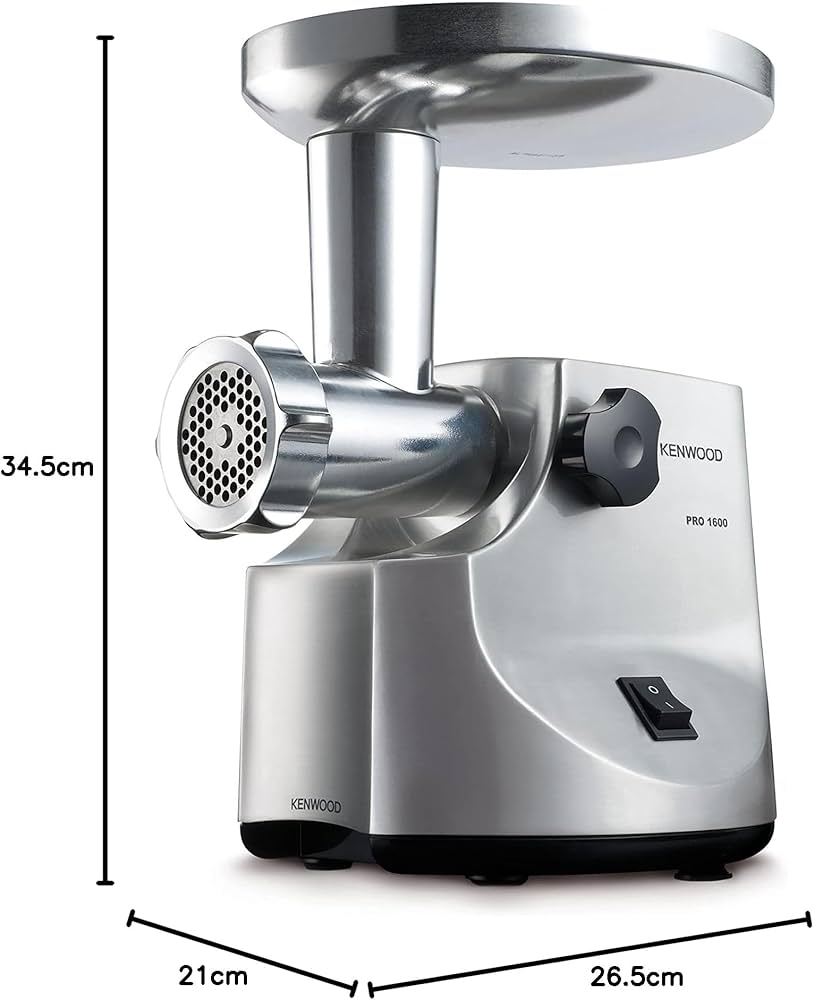
Once all your parts are sparkling clean and, most importantly, completely dry, it’s time to reassemble. Going in the reverse order is key.
- Attach the Housing: Connect the main T-shaped housing back onto the motor base and lock it into place.
- Insert the Auger: Slide the long auger back into the housing, ensuring the end with the plastic or rubber washer goes in first, towards the motor.
- Place the Blade: Slide the sharp blade onto the square-shaped pin at the end of the auger. Crucially, the flat side of the blade must face outwards, sitting flush against the grinding plate you’re about to add. If you put it on backward, it won’t grind; it will just smash and tear the meat.
- Position the Grinding Plate: Place your chosen grinding plate over the blade, aligning the small notch on the plate with the corresponding pin on the housing. This prevents it from spinning.
- Screw on the Locking Ring: Place the locking ring over the plate and tighten it clockwise. Tighten it until it’s snug, but don’t overtighten it to the point where you’ll struggle to get it off next time. It’s often called “hand-tight.”
- Place the Hopper and Pusher: Finally, set the hopper tray on top and place the food pusher back in the feeder tube.
Your meat grinder is now clean, correctly assembled, and ready for your next culinary adventure. If you’re looking for a new machine, be sure to check out our reviews of the best meat grinders for home use.
Frequently Asked Questions (FAQ)
Q: How often should I disassemble my meat grinder?
A: You should disassemble and thoroughly clean your meat grinder after every single use. Raw meat bacteria can multiply quickly, so immediate and proper cleaning is essential for food safety.
Q: Are any meat grinder parts dishwasher safe?
A: Generally, no. Most metal components are made of materials like cast aluminum that will corrode and turn black in the dishwasher due to the harsh detergents and high heat. Always check your user manual, but hand-washing is the safest bet for all metal parts. Some plastic or stainless steel parts may be top-rack safe.
Q: What should I do if a part is stuck and won’t come off?
A: If the locking ring is stuck, try tapping it gently around the circumference with the handle of a wooden spoon to loosen the threads. For parts stuck with hardened fat, soaking the entire grinding head in hot, soapy water for 15-20 minutes can help dissolve the grease and make disassembly easier.
Q: Is it necessary to oil the parts after cleaning?
A: It’s a great practice! After drying the parts completely, applying a light coat of food-grade mineral oil to the blade, plates, and auger can prevent rust and keep the components in top condition, especially if you store the grinder for long periods.
Q: Does how to disassemble a meat grinder change much between brands?
A: While there might be slight variations in the locking mechanisms, the fundamental order of parts—ring, plate, blade, auger—is nearly universal across all major brands like LEM, KitchenAid, and Cabela’s. Once you learn on one, you can confidently handle almost any other.
Your Grinder’s Best Friend: Proper Care
Mastering how to disassemble a meat grinder is the single most important skill you can learn as a grinder owner. It transforms a potentially messy chore into a simple, quick routine that protects your health, your investment, and the quality of your food. It’s the difference between a tool that lasts a lifetime and one that ends up in the back of a cabinet. So next time you finish grinding, take those five extra minutes. Your future self—and your taste buds—will thank you.