Ever bite into a sausage and think, “This is good, but it could be great?” You’re not alone. The journey of learning How To Make Sausage At Home is one of the most rewarding culinary adventures you can embark on. It’s about transforming simple cuts of meat into something bursting with flavor, texture, and personality—your personality. Forget the bland, uniform links from the supermarket. We’re diving deep into the craft of creating juicy, perfectly seasoned sausages right in your own kitchen. This isn’t just a recipe; it’s a skill that will change the way you cook forever.
Why Bother Making Sausage at Home?
Let’s be real: you can buy sausage anywhere. So why go through the trouble? Well, the first time you taste a sausage you made yourself, you’ll get it. The difference is night and day.
- Absolute Flavor Control: You are the master of your sausage. Love garlic? Add more. Crave some heat? Throw in some chili flakes. From classic Italian to a smoky and sweet breakfast blend, the flavor profile is entirely up to you.
- Ingredient Purity: Do you know what’s in that store-bought sausage? Often, it’s a laundry list of fillers, preservatives, and mystery bits. When you make your own, you know exactly what’s going in: quality meat, fresh spices, and nothing else.
- Perfect Texture: The texture of a great sausage is all about the grind and the fat content. By grinding the meat yourself, you control the coarseness and the lean-to-fat ratio, ensuring a juicy, satisfying bite every single time, not a dry, crumbly disappointment.
- It’s Surprisingly Fun: There’s something incredibly satisfying about the process. It’s hands-on, a little bit rustic, and a fantastic project for a weekend afternoon. Plus, the bragging rights are huge.
Gearing Up: The Essential Sausage Making Toolkit
You don’t need a professional butcher’s shop to get started, but a few key pieces of equipment will make your life a whole lot easier.
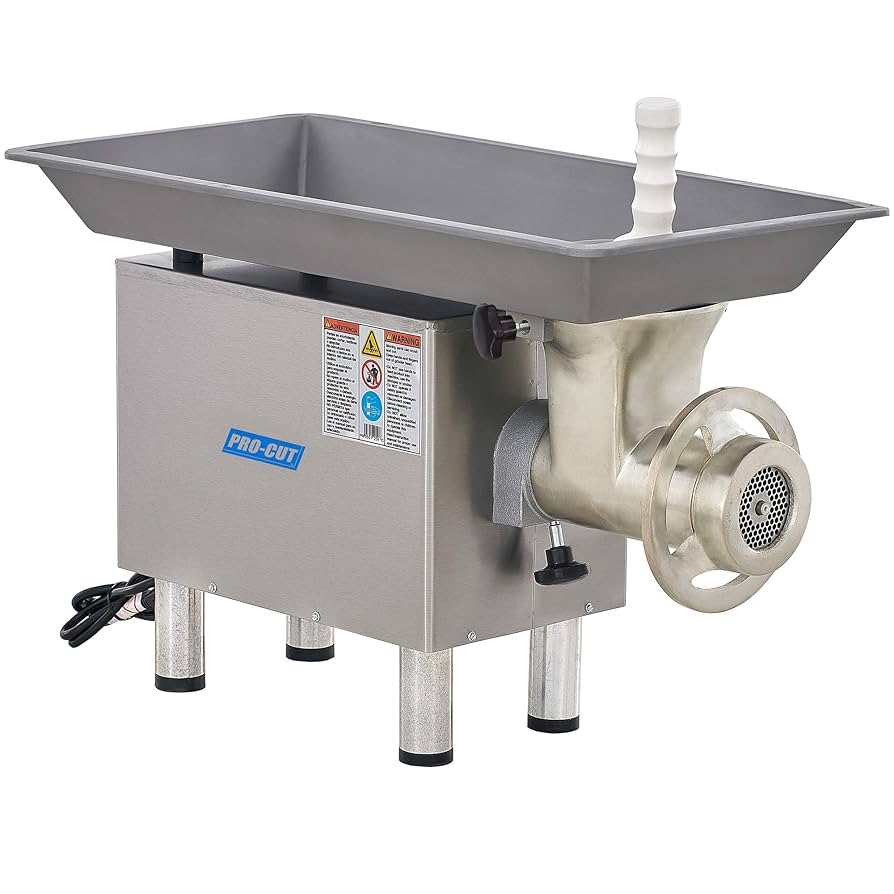
The Heart of the Operation: Your Meat Grinder
This is the non-negotiable star of the show. A quality meat grinder is what gives you control over the texture and composition of your sausage. Whether you opt for a sturdy manual grinder for smaller batches or a powerful electric model for bigger projects, this tool is your ticket to sausage-making freedom. The ability to switch between coarse and fine grinding plates is crucial.
The Sausage Stuffer Attachment
Most modern meat grinders come with a set of sausage stuffing tubes or horns. These attachments allow you to feed the ground meat mixture directly into the casings. If your grinder doesn’t have one, standalone sausage stuffers are also a great investment for serious enthusiasts.
Sausage Casings: Natural vs. Collagen
Casings are the “skin” that holds your sausage together. You’ve got two main choices:
- Natural Casings: Typically made from the intestines of hogs or sheep, they provide that classic “snap” when you bite into them. They need to be rinsed and soaked before use.
- Collagen Casings: These are processed, easy to use, and more uniform in size. They’re a fantastic option for beginners as they don’t require as much prep.
Other Kitchen Essentials
- A reliable digital kitchen scale
- Large mixing bowls (preferably metal, to keep things cold)
- A baking sheet or two
- Spices and seasonings
- Ice water
|
Our Picks for the Best Meat Grinder in 2026
As an Amazon Associate, we earn from qualifying purchases.
|
||
| Num | Product | Action |
|---|---|---|
| 1 | VEVOR Commercial Meat Grinder, 550LB/h 1100W Electric Meat Mincer, ETL Approved Heavy Duty Industrial Meat Mincer Machine |

|
| 2 | AAOBOSI Meat Grinder Electric 3000W Max with Touch Color Screen, Auto-Reverse & Built-in Storage - 3 Speed Settings,Grinding, Sausage & Kibbe Making for Home Use, Stainless Steel |
|
| 3 | MEAT! 1.5 HP Meat Grinder with 3 Stuffing Tubes, 2 Stainless Steel Grinding Plates, and a Stainless Steel Stuffing Plate for Making Ground Meat |
|
| 4 | MEAT! 1.5 HP Meat Grinder with 3 Stuffing Tubes, 2 Stainless Steel Grinding Plates, and a Stainless Steel Stuffing Plate for Making Ground Meat |
|
| 5 | LEM Products BigBite #22 Meat Grinder, 1.0 HP Stainless Steel Electric Meat Grinder Machine, Ideal for Heavy Use |
|
| 6 | Weston Pro Series Electric Meat Grinder 7 Sausage Stuffer, Commercial Grade, 1500 Watts, 2 HP, 21lbs. Per Minute, Heavy Duty Stainless Steel (10-3201-W) |
|
| 7 | LEM Products BigBite #8 Meat Grinder, 0.50 HP Stainless Steel Electric Meat Grinder Machine, Ideal for Regular Use |
|
| 8 | Commercial Meat Grinder #12,0.9HP Electric Meat Mincer,Heavy Duty Stainless Steel Industrial Meat Mincer w/2 Blades & Meat Pusher,Food Grinders Machine for Home Kitchen Regular Use |
|
| 9 | STX International Turboforce II 4000 Electric Meat Grinder | Grinds Soft Bones | Foot Pedal | 6 Grinding Plates | Stainless Steel Blades | Sausage Tubes | Kubbe Maker | Meat Claws | Patty Press & More |
|
| 10 | Electric Meat Grinder, Sausage Stuffer with 3 Sausage Tubes, 2 Blades, 3 Plates, 3200W Max, Meat Grinder Heavy Duty for Home Kitchen Use, Stainless Steel (Black) |
|
The Holy Trinity: Meat, Fat, and Seasoning
A great sausage is a perfect balance of these three elements. Get this part right, and you’re 90% of the way there.
What’s the best meat for homemade sausage?
The best cut is one with a good amount of fat marbled throughout. Pork shoulder (or pork butt) is the undisputed king of sausage making. It naturally has an ideal fat-to-meat ratio. For beef sausage, chuck is a great option. You can even get creative with lamb, chicken thighs (never breast!), or venison, but you’ll likely need to add extra fat.
The Golden Rule: The Fat Ratio
Fat equals flavor and moisture. This is the secret to a juicy, succulent sausage. The ideal fat content for most sausages is between 20-30%. If you’re using a leaner cut of meat like venison, you’ll need to supplement it with pure pork fatback to hit that magic number. Trust me, don’t skimp on the fat.
Seasoning: Your Flavor Signature
This is where you get to be an artist. Salt is the most crucial seasoning, not just for flavor but also for curing and binding the meat. A good rule of thumb is to use about 1.5% of the meat’s weight in kosher salt. From there, the sky’s the limit. Think fennel and red pepper for Italian sausage, or sage, thyme, and a hint of maple for a classic breakfast patty.
The Main Event: How to Make Sausage at Home, Step-by-Step
Ready to roll up your sleeves? Here’s a detailed walkthrough of the process. The number one rule before we begin? Keep everything ice cold. Warm meat and fat will smear, resulting in a poor texture.
- Chill Everything. And I mean Everything.
Cut your meat and fat into 1-inch cubes. Place them on a baking sheet in a single layer and put them in the freezer for about 30-45 minutes. You want them to be very firm but not frozen solid. Put your grinder parts (the head, auger, blade, and plate) and your mixing bowl in the freezer, too. - Cut and Season the Meat.
Once chilled, transfer the cubed meat and fat to your frozen mixing bowl. Add all your dry seasonings and mix gently with your hands until everything is evenly coated. - The First Grind.
Assemble your chilled meat grinder with the coarse grinding plate. Turn the grinder on and begin feeding the seasoned meat cubes into the hopper. Use the food pusher to gently guide the meat down—never use your fingers. Let the machine do the work. - The “Primary Bind”: Mix It Up.
Once all the meat is ground, add any liquid ingredients (like ice water, wine, or vinegar). Now, using your hands or the paddle attachment on a stand mixer, mix the ground meat for 2-3 minutes. You’re looking for a change in texture; the mixture will become sticky and tacky. This is the protein extraction that binds the sausage together. - Stuffing the Casings.
Switch your grinder setup to the stuffing attachment. Slide your prepared casing onto the stuffing tube, leaving a few inches overhanging. Feed the sausage mixture back into the grinder’s hopper. As the meat begins to come out, tie a knot in the end of the casing. Guide the casing off the tube as it fills, trying to avoid air pockets. Don’t overstuff them; you want them to be full but still have a bit of give. - Linking the Sausages.
Once you have one long coil of sausage, you can link them. Pinch the sausage at your desired link length (say, 6 inches). Then, pinch it again 6 inches further down. Twist the first link you created forward a few times. For the next link, twist it backward. Continue this alternating pattern down the entire length of the coil. - Rest and Cure.
Place your finished links on a baking sheet lined with parchment paper and let them rest, uncovered, in the refrigerator overnight. This allows the flavors to meld and the casings to dry out slightly, which helps with browning when you cook them.
Pro Tips from the Trenches
After making countless batches, you pick up a few tricks. Here are some of my favorites:
- The Test Patty: Before you stuff all that meat into casings, pan-fry a small spoonful of your mixture. Taste it and adjust the seasonings if needed. This is your last chance to get the flavor perfect.
- Fight Air Pockets: If you see a large air bubble in your casing while stuffing, don’t panic. Use a clean pin or a sausage pricker to poke a tiny hole and release the air.
- The Bread Trick: When you’re done grinding, run a piece or two of stale bread through the grinder. It will push out the last bits of meat from the auger and head, making cleanup much easier.
“The single biggest mistake beginners make is not keeping their meat and equipment cold enough. Warm fat smears instead of grinds, and you lose that perfect texture. If you think it’s cold, make it colder.”
— Chef David Wilson, Culinary Institute Graduate
How to clean your equipment like a pro?
Proper cleaning is essential for food safety and the longevity of your grinder. The easiest way to clean a meat grinder is to do it immediately after use. Disassemble all the parts, hand wash them with hot, soapy water and a bottle brush, then rinse thoroughly. Dry every single piece completely before storing to prevent rust.
Post-Grinding Cleanup Checklist
- [ ] Disassemble all grinder parts immediately.
- [ ] Use the bread trick to push out excess meat.
- [ ] Hand wash all components in hot, soapy water.
- [ ] Use a brush to clean inside the grinding plates and head.
- [ ] Rinse all parts with hot water.
- [ ] Dry every single component thoroughly with a towel.
- [ ] Lightly coat carbon steel parts (like the blade and plates) with food-grade mineral oil before storing.
Frequently Asked Questions
Q: Can I make sausage without a meat grinder?
A: Yes, but it’s much more difficult. You can finely chop the meat and fat by hand with a very sharp knife or use a food processor in short pulses. However, a Meat Grinder Provides far superior and more consistent results for texture.
Q: How long does homemade sausage last?
A: Fresh, uncooked sausage will last for about two to three days in the refrigerator. For longer storage, it’s best to freeze it.
Q: Why is my sausage crumbly after cooking?
A: This is usually caused by one of two things: not enough fat in your meat mixture, or you didn’t mix it enough to achieve the “primary bind.” That sticky texture you create during mixing is what holds the sausage together.
Q: What’s the difference between natural and collagen casings?
A: Natural casings come from animals and provide a classic, snappy texture but require more prep. Collagen casings are processed, easier to handle, and more uniform, making them great for beginners.
Q: Can I freeze homemade sausage?
A: Absolutely! You can freeze it either in bulk (before stuffing) or as finished links. Wrap them tightly in plastic wrap and then in foil or a freezer bag. They will keep well in the freezer for up to three months.
Your Sausage Making Journey Starts Now
There you have it. You are now armed with the knowledge of how to make sausage at home. It might seem like a lot of steps, but once you do it once, you’ll see how straightforward and enjoyable the process really is. The incredible flavor, the perfect texture, and the pride of knowing you made it from scratch are more than worth the effort. So go ahead, pick a recipe, fire up that grinder, and start your next great culinary adventure. We can’t wait to see what you create.