The joy of crafting your own sausages, burgers, or ground meat dishes is unmatched, offering superior flavor and control over ingredients. Yet, this satisfying culinary endeavor often encounters a frustrating adversary: silver skin. This tenacious connective tissue can bring your meat grinder to a grinding halt, tangling around the blade and causing blockages that disrupt your flow and test your patience. Fortunately, with the right preparation, equipment, and technique, you can easily overcome this challenge and ensure a smooth, efficient grinding experience every time.
This comprehensive guide will equip you with practical strategies to effectively manage silver skin, from meticulous trimming to optimal grinding practices, transforming your meat grinding from a chore into a seamless process.
Understanding Silver Skin and Its Impact on Your Grinder
Silver skin, also known as fascia, is a thin, silvery-white membrane of connective tissue found on various cuts of meat. Unlike fat, which renders down during cooking and can pass through a grinder, silver skin is incredibly tough and fibrous. When it enters a meat grinder, it doesn’t break down; instead, it stretches, wraps around the blade, and accumulates on the grinding plate. This buildup quickly reduces the grinder’s efficiency, leading to slow operation, unevenly ground meat, and ultimately, a complete clog that requires disassembly and cleaning. Ignoring silver skin can strain your grinder’s motor and potentially shorten its lifespan.
Preparing Your Meat for a Clog-Free Grind
Proper meat preparation is the most critical step in preventing silver skin from jamming your grinder. A little effort upfront saves a lot of hassle during the grinding process.
The Art of Trimming
The primary defense against silver skin clogs is thorough trimming. It’s essential to remove as much silver skin, sinew, and large, gristly pieces of fat as possible before the meat even touches your grinder.
- Identify Silver Skin: Look for the translucent, shiny membrane on the surface of your meat. It often appears as a silvery sheet or tough, whitish strands.
- Tools for the Task: A sharp boning knife or a flexible fillet knife is your best friend here. Their narrow, sharp blades allow for precise cuts close to the meat, minimizing waste.
- Trimming Technique:
- Start by getting under one end of the silver skin with your knife. Angle the blade slightly upward, against the silver skin, to create a small tab you can grip.
- Hold the tab firmly and pull it taut, away from the meat.
- With your knife blade angled almost parallel to the meat, use a gentle sawing motion, pressing against the silver skin to separate it from the muscle without removing too much meat. The tension on the silver skin will help guide your blade.
- Repeat this process until all significant pieces of silver skin are removed. While it’s ideal to remove as much as possible, for very small, embedded pieces, a good rule of thumb is to “trim the heavy” – focusing on larger, more prominent sections that are most likely to cause issues.
|
Our Picks for the Best Meat grinder in 2026
As an Amazon Associate I earn from qualifying purchases.
|
||
| Num | Product | Action |
|---|---|---|
| 1 | KitchenAid Stand Mixer Attachment, Food Grinder KSMMGA, Metal Food Grinder |

|
| 2 | LEM Products BigBite #8 Meat Grinder, 0.50 HP Stainless Steel Electric Meat Grinder Machine, Ideal for Regular Use |
|
| 3 | GANIZA Food Processors, Electric Food Chopper with Meat Grinder & Vegetable Chopper - 2 Bowls (8 Cup+8 Cup) with Powerful 450W Copper Motor - Includes 2 Sets of Bi-Level Blades for Fruits/Meat/Nuts |
|
| 4 | Meat Chopper, Hamburger Grinder, Premium Heat Resistant Smasher for Ground Beef, Burger Grinder Nylon Potato Mix Tool, Meat & Poultry Tenderizers-Black |
|
| 5 | Oaomi 3200W Max Electric Meat Grinder & Sausage Stuffer - Mincer Machine with Tool 2 Blade And 3 Plates, 3 Tubes & Kubbe Kit Tool for Home Kitchen Use(Black) |
|
| 6 | Meat Grinder, Sausage Stuffer, [2800W Max] Electric Meat Mincer with Stainless Steel Blades & 3 Grinding Plates,Sausage Maker & Kubbe Kit for Home Kitchen & Commercial Using |
|
| 7 | Meat Grinder Manual Mincer 2-in-1 Manual Meat Grinder Sausage Maker Table Mount Pork Mincer Sausage Stuffer Funnel Make Homemade Burger Patties Hand Operated Kitchen Tool FQ |
|
| 8 | CHEFFANO Electric Meat Grinder, [2000W Max] Heavy Duty Meat Mincer with 2 Blades, 3 Plates, Sausage Tube & Kubbe Kit for Home Kitchen Use |
|
| 9 | CHEFFANO Meat Grinder, 2600W Max Stainless Steel Meat Grinder Electric, ETL Approved Heavy Duty Meat Mincer Machine with 2 Blades, 3 Plates, Sausage Stuffer Tube & Kubbe Kit for Home Kitchen Use |
|
| 10 | Electric Meat Grinder, Sausage Stuffer with 3 Sausage Tubes, 2 Blades, 3 Plates, 3200W Max, Meat Grinder Heavy Duty for Home Kitchen Use, Stainless Steel (Black) |
|
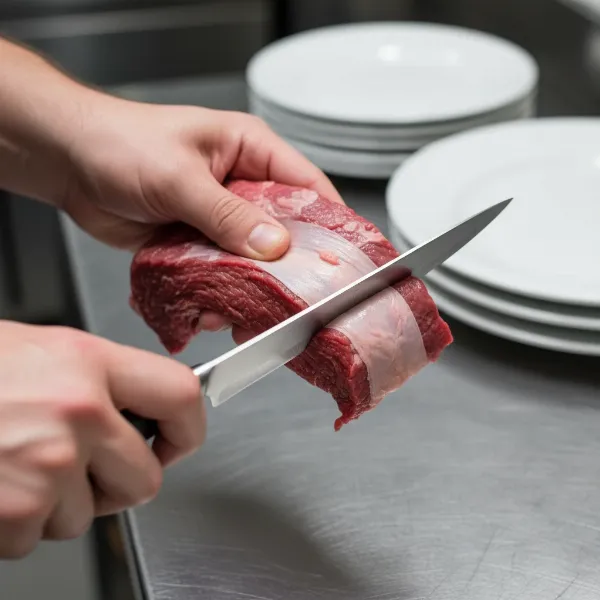 Expertly trimming silver skin from meat using a sharp boning knife for clog-free grinding.
The Power of Cold
Temperature plays a surprisingly significant role in grinding success. Cold meat is firm meat, and firm meat grinds much more efficiently.
- Partially Freeze Your Meat: Before grinding, cut your trimmed meat into 1-2 inch cubes and place them on a baking sheet lined with parchment paper. Freeze for 30 to 60 minutes, or until the edges are firm but the center is still slightly pliable. This semi-frozen state allows the grinder’s blade to cut cleanly through the meat rather than smearing it.
- Chill Your Grinder Components: For optimal results, consider chilling your grinder’s blade, plate, and auger in the freezer for about 15-30 minutes before use. A cold grinder maintains a consistently cold environment for the meat, further reducing friction and preventing clogs.
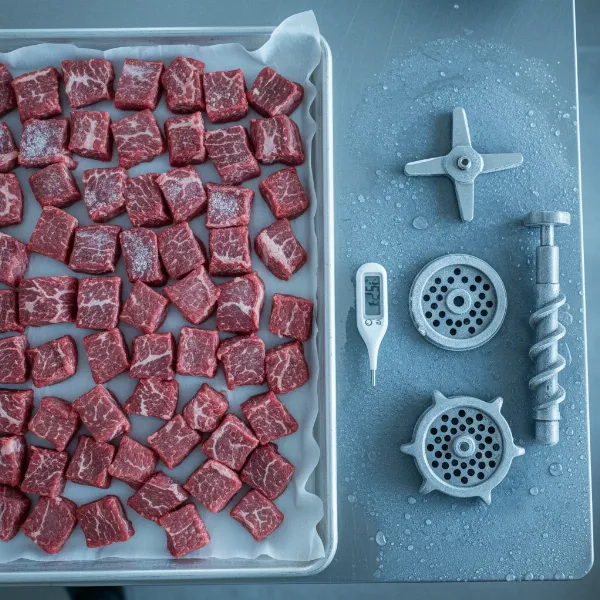 Cubes of partially frozen meat on a baking sheet next to chilled metal grinder parts (blade, plate, auger) on a clean surface.
Portioning for Performance
Even after trimming and chilling, the size of your meat pieces matters. Cut your meat into uniform cubes or strips that can easily fit down the grinder’s feed tube without forcing. Overly large or irregular pieces can put unnecessary strain on the motor and lead to jams.
Optimizing Your Grinder for Peak Performance
Your equipment’s condition and proper setup are just as crucial as meat preparation.
Sharpness Matters
A sharp blade is non-negotiable for efficient grinding. A dull blade won’t cut the meat cleanly; instead, it will tear and smash it, increasing friction and making silver skin much more likely to wrap around the blade and clog the plate.
- Regular Inspection: Routinely check your grinder blade for sharpness and any signs of wear.
- Sharpen or Replace: If your blade feels dull, have it professionally sharpened or replace it. Many manufacturers offer replacement parts, and a sharp blade is a worthwhile investment for hassle-free grinding.
Choosing the Right Die Plate
Meat grinders come with various grinding plates, each with different-sized holes. Selecting the appropriate plate for your task can significantly impact clog prevention.
- Coarser Plates for Connective Tissue: If you’re grinding meat that naturally contains more connective tissue, start with a coarser grinding plate. Larger holes allow for easier passage, reducing the chance of tough bits getting stuck.
- Avoid Fine Plates Initially: Using a fine plate with untrimmed or poorly chilled meat is an invitation for clogs. If you need a finer grind, consider a double grind: first through a coarse plate, then through a finer one, ensuring the meat is well-chilled between passes.
Smart Grinding Techniques
Even with perfectly prepared meat and an optimized grinder, your technique during the actual grinding process can make a difference.
Mindful Feeding
- Consistent, Slow Pace: Don’t rush the process. Feed meat into the grinder at a steady, consistent pace. Allow the auger to pull the meat through without excessive force.
- Avoid Overloading: Resist the urge to pack the feed tube full. Overloading can overwhelm the motor and increase the likelihood of clogs. Feed smaller batches, letting each piece clear before adding the next.
Listen to Your Grinder
Pay attention to the sounds and performance of your machine.
- Signs of Clogging: If the grinder starts to slow down, struggle, or if the meat coming out looks smeared rather than cleanly cut, it’s a sign that silver skin or other connective tissue might be accumulating.
- Prompt Action: The moment you notice these signs, stop the grinder immediately. Disassemble the head, clear any wrapped silver skin or buildup from the blade and plate, and then reassemble before continuing. Addressing minor clogs quickly prevents them from becoming major headaches.
Post-Grinding Care for Longevity
Proper cleaning and storage not only extend the life of your meat grinder but also ensure optimal performance for your next grinding session.
Immediate Cleaning
- Disassemble Thoroughly: After each use, completely disassemble your grinder’s head, including the auger, blade, and plate.
- Remove Residue: Run a few pieces of stale bread through the grinder to help push out any remaining meat particles. Then, wash each component by hand using hot, soapy water. Most grinder parts are not dishwasher safe and can be damaged by high temperatures or harsh detergents.
- Scrub Away Buildup: Use a small brush to remove any stubborn bits of meat or silver skin that may cling to the nooks and crannies of the blade and plate.
Proper Drying and Storage
- Prevent Rust: Thoroughly dry all metal components immediately after washing. Even a small amount of moisture can lead to rust.
- Mineral Oil Protection: Once dry, wipe metal parts with a food-grade mineral oil. This creates a protective barrier against rust and keeps parts lubricated.
- Store Disassembled: Store your grinder components in a dry place, ideally disassembled, to allow for air circulation and prevent moisture buildup. Some enthusiasts even store small parts like blades and plates individually wrapped in rice to absorb any residual moisture.
By diligently following these preparation, operation, and maintenance practices, you will transform your meat grinding experience. You’ll not only prevent frustrating clogs but also consistently achieve superior quality ground meat, making your culinary endeavors more enjoyable and efficient.
What are your go-to tips for achieving perfect ground meat every time?
Frequently Asked Questions
What exactly is silver skin?
Silver skin is a tough, thin, silvery-white layer of connective tissue, also known as fascia, found on various cuts of meat. Unlike fat, which breaks down, silver skin remains intact and can cause clogs in Meat Grinders.
Can I leave some silver skin on if my grinder is powerful enough?
While some small, thin pieces might pass through a very powerful grinder with a coarse plate, it’s generally best practice to remove as much silver skin as possible. Even a strong grinder can struggle, and leaving it on can lead to clogs, strain the motor, and result in chewy bits in your final product.
What kind of knife is best for trimming silver skin?
A sharp, flexible boning knife or fillet knife is ideal for trimming silver skin. Its narrow, sharp blade allows you to get under the membrane and slice it away cleanly, minimizing meat waste.
How cold should meat be before grinding?
Meat should be very cold, ideally partially frozen, before grinding. Cut it into cubes and freeze for 30-60 minutes until the edges are firm but the center is still slightly pliable. This firmness allows for a cleaner cut and prevents smearing and clogging.
How often should I sharpen my grinder blades?
The frequency of sharpening depends on how often you use your grinder and the type of meat you process. However, it’s good practice to inspect your blade regularly for sharpness. If it feels dull or you notice the grinder struggling, it’s time for sharpening or replacement to maintain optimal performance.